Our website has recently been updated. Some images or features may be unavailable. Please bear with us as we work to improve your experience.
Coupler Installation Tips
Some Basics

In order to get the most enjoyment from your model railroading experience, having a coupler system with smooth and reliable performance is essential. The following information explains some of the basic principles of mounting and fine tuning our couplers for the best performance.
Kadee® couplers are designed to be mounted at the NMRA Standard coupler heights and our Coupler Height Gauges are manufactured to these standards. Most manufacturers of model railroad locomotives and rolling stock have yet to standardize their coupler pockets, draft gear boxes, or coupler mounting platforms. And while a majority of model makers have adopted some form of knuckle coupler, many of them do not conform to NMRA Standards. This means that choosing the correct coupler solution and proper installation is essential for compatibility.
Newer HO models with Bachmann® EZ-Mate®, Athern® McHenry, Accumate®, Walther® Proto Max®, or other knuckle couplers most often use our #148 Whisker® Coupler as a direct replacement. But remember to always check for proper coupler height using one of our Coupler Height Gauges.
Height is Important
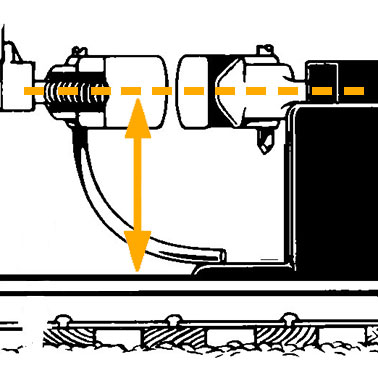
Couplers work best when they are all mounted at the same height. Kadee® couplers are designed to be mounted at the NMRA Standard coupler heights. Coupler heights are measured from the top of the rail to the centerline of the coupler head. Luckily, measuring coupler height is a breeze when using one of our Coupler Height Gauges.
Couplers should always be mounted along the centerline and as level as possible. Couplers that slant, droop, or tilt have a higher chance of slipping apart under pulling stress or grade transition. Keep in mind that properly aligned couplers cannot always compensate for rough track.
Kadee® manufactures couplers in a variety of heights to ensure that your couplers will line up, regardless of car manufacturer. Use of Overset Shanks, Centerset Shanks, and Underset Shanks along with shims allows for precise alignment of the coupler heads. Remember; it's easier to lower a coupler to the proper height by adding shims than it is to remove material to raise a coupler that's too low.

Helpful Tools

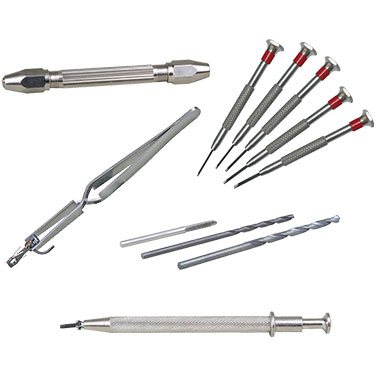
Having some common tools on hand can be very helpful when installing and adapting couplers. A set of precision Phillips and flat-head screwdrivers will make easy work of small screws. An assortment of hobby files can be useful for eliminating hang-ups and tight fits. Tools like the #1020 Coupler & Special Purpose Tweezers, #239 Mark V Gripper, and #240 Double Headed Double Ended Pin Vise make handling small components easier.
You may also find a use for an assortment of tap and drills for enlarging holes and creating threads for screws. Having a hobby saw and hobby knife on hand can make quick work of any major modifications that may be needed. And don't forget your eye protection.
Glues and solvent cements are not recommended for attaching gear boxes to your model except when there is no other option. You may need to access the coupler in the future and gluing the gear box is more or less permanent.
Mounting Draft Gear Boxes
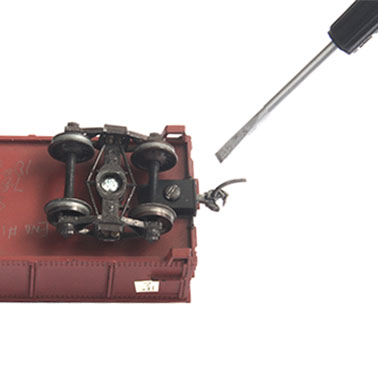
All of our coupler pockets, draft gear boxes, and mounting brackets are designed to be attached with screws. Some of our couplers include screws for common mounting situations while others have so many mounting options that it's impractical to include an assortment of screws for every possible situation. In these cases, the instructions included with your couplers will recommend the proper screws for your specific needs. Kadee® carries a full assortment of screws for use with all of our couplers and gearboxes.
Our draft gear boxes are made in a variety of materials including styrene plastic, acetal plastic, and die cast zinc metal. If you must use glue, make sure to use the appropriate adhesive for the material you are gluing. Use a liquid styrene cement for styrene gear boxes and a cyanoacrylate glue (CA glue) for zinc metal boxes. Unfortunately acetal plastic cannot be easily glued. However thicker slow-setting CA glues might work well enough after applying an adhesive primer such as Loctite® SF 770.
Once you've assembled and installed your couplers and gear boxes, make sure to add a little bit of our #231 Greas-em Graphite Lubricant into the gear box to ensure smooth and long-lasting operation.

